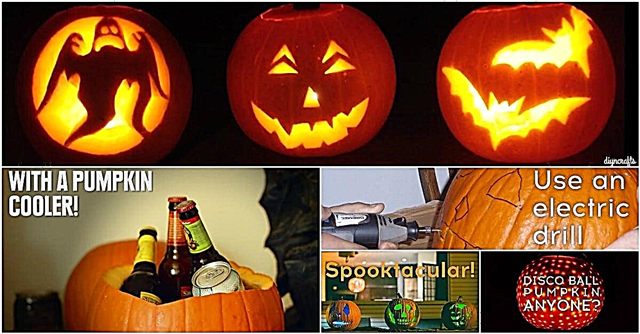
Att bryta saker är aldrig kul och betyder ofta att man kastar ut något innan dess tid. Du kan ha massor av trasiga tekoppar, tavelramar, möbler eller andra vanliga hushållsartiklar som du tror hör hemma i papperskorgen.
Tvärtom, det finns många olika projekt som du kan göra med de trasiga föremålen och skapa fantastisk inredning för inomhus och utomhus, allt från saker som du kanske anser vara skräp. Vi har samlat en lista med 100 olika projekt som kräver de trasiga föremålen eller vanligt hushållsavfall.
Återanvändning är ett utmärkt sätt att hålla saker borta från soptippen och ge ditt hem en liten inredning. Dessa projekt är relativt enkla, tar lite tid och bäst av allt, de låter dig helt återanvända det papperskorgen till något användbart.
Ta tag i dina trasiga hushållsartiklar och titta på de olika sätten att du kanske kan återuppliva den till. Du vet vad de säger - en flickas skräp är en annan flickas skatt.
Förvandla en trasig bildram till en örhänge
Kasta inte basen när du bryter (eller dina barn eller husdjur bryter) glaset ur en bildram. Använd den istället för att skapa en underbar och mycket funktionell örhänge. Du behöver någon form av tråd (bildtråd fungerar riktigt bra) för att hänga örhängen på. Kör bara tråden över ramen och häng sedan upp örhängen. Det här är en bra presentidé för tjejer i alla åldrar och du kan köra så mycket tråd och göra så många nivåer som du vill. Om du har längre örhängen som dinglar, gör du längre nivåer.
DIY-instruktioner och projektkredit - Kevinandamanda

Skapa ett lekekök från ett trasigt underhållningscenter
Istället för att ta bort det gamla underhållningscentret till soptippen, ta ett par timmar och förvandla det till ett bedårande lekekök för din lilla tjej. Centret behöver inte vara i perfekt skick eftersom du kan förstärka allt som behöver det och det förväntas egentligen inte hålla mycket vikt, hur som helst. Bara lite färg och fantasi är verkligen allt du behöver för att göra den gamla ögonen till något som någon liten flicka kommer att få timmar av glädje av. Dessutom är det ett utmärkt ställe att lagra alla de leka leksakerna.
DIY-instruktioner och projektkredit - Diynetwork

Skapa ett återvinningscenter med en gammal korg
Om du har en ganska stor korg som verkar röra sig ihop i sömmarna, kan du återanvända den i en bra återvinningsstation. Korgen behöver egentligen inte kunna hålla något så hål i botten är helt fina. Du placerar helt enkelt avfallskorgar i rottingkorgen för din återvinning och märker sedan avsnitten så att du vet var allt går. Detta hjälper dig inte bara att använda den upprivna korgen till god användning, det ger dig en riktigt attraktiv plats att förvara dina återvinningsbara produkter.
DIY-instruktioner och projektkredit - Bhg

Skapa nya sommarflip-flops från gamla
Istället för att slänga ut dessa flip-flops när remmarna lossnar och du inte kan hålla ihop dem, överväga att skapa alla nya skor från dem istället. Med bara lite tyg kan du göra dessa bedårande flätade flip-flops som är perfekta för sommaren och låter dig behålla de gamla skorna även när de ser ut som de är redo för papperskorgen. Du kan till och med göra flätade remmar av gamla t-shirts eller andra kläder som har hål och måste kastas ut, så den här är en dubbel poäng.
DIY-instruktioner och projektkredit - Makeit-loveit

Förvandla babylotionflaskor till laddningsstationer för mobiltelefoner
Baby lotionflaskor tenderar att hamna i papperskorgen när de är tomma. När allt kommer omkring, vad kan du göra med de tomma flaskorna? Du kan skapa en riktigt praktisk mobiltelefonladdningsstation som förhindrar att dina sladdar är ute i det fria. Med bara lite tyg, lite klippning och lite tid kan du göra den här riktigt praktiska laddningsstationen för mobiltelefoner som håller din telefon och sladden precis intill plug-in så att du sparar plats och sladden inte ligger på golvet (vilket för övrigt är en dålig plats för det om du har husdjur).
DIY-instruktioner och projektkredit - Makeit-loveit

Gör ljusarmaturer från gamla trådkorgar
Istället för att skicka de gamla trådkorgarna till soptippen, även när de är helt slitna, förvandla dem till riktigt attraktiva armaturer. Även om korgarna har ledningar som har lossnat eller har hål i botten kan du använda dem för att skapa de Anthropologie-inspirerade armaturerna som kommer att se bra ut i köket. Du behöver bara förbereda korgen och sedan ansluta till din pendellampa. Du kan måla den för att matcha din köksdekor i förväg om du vill eller bara lämna den som den är.
DIY-instruktioner och projektkredit - Ashleyannphotography

Använd trasiga krukor som trädgårdsmarkörer
Om du har terrakottakrukor som är lite sämre för slitage, behöver du inte kasta ut dem. Du kan använda dem för att göra underbara trädgårdsmarkörer. Detta fungerar även om du bara har en pott som är trasig. Ta bara några bitar och skriv namnen på dina blommor, örter eller grönsaker med magisk markör så att den inte lossnar eller så kan du vara riktigt kreativ och måla namnen på (du kan skapa lite konst på dem också ). Om du har flera gamla krukor som inte är lämpliga för plantering, använd dem för att märka allt i din trädgård.
DIY-instruktioner och projektkredit - knappt husmor

Förvandla en gammal byrå till en mysig bänk
Jag älskar allt om detta möbelprojekt! Instruktionerna är enkla och om du lyckas få en av dessa gamla byråer till billiga är det ett måste-projekt!
DIY-instruktioner och projektkredit - Grillo Designs

Vänd trasig Terra Cotta till pumpor
De gamla trasiga terrakottaplantarna kan användas för att skapa vackra pumpor. Du kan faktiskt göra detta med valfritt antal keramik, så om du har tallrikar eller fat som är trasiga, använd dem också. Du måste bara göra små bitar och sedan sätta ihop ett mosaikliknande utseende på en skumkula. Detta är också ett fantastiskt projekt för jul, bara du kan använda semesterfärger för att skapa ornament. De är väldigt lätta att göra och det slår bara att kasta de trasiga planteringarna och tallrikarna i papperskorgen.
DIY-instruktioner och projektkredit - Craftsncoffee

Skapa konst med spruckna tallrikar
Istället för att direkt kasta ut de spruckna tallrikarna, varför inte göra dem till konst som du kan visa på ditt kök eller matsalsvägg? Detta är ett utmärkt projekt för plattor som faktiskt delas upp i två eller flera bitar. Du vill antagligen inte limma ihop dem om de är krossade men om du bara har några större bitar kan du bara limma ihop dem på detta sätt och använda dem för att dekorera dina väggar. Det är ett riktigt bra projekt för äldre rätter som du bara inte kan bli av med, även om de är trasiga.
DIY-instruktioner och projektkredit - Homelife

Gör ett fågelbad med spruckna planteringar och tallrikar
Använd de spruckna terrakottaplantarna och de trasiga eller spruckna tallrikarna för att skapa ett vackert fågelbad för din trädgård. Du kan använda planteringsmaskiner i olika storlekar, så om du har flera som är skadade är detta ett bra sätt att återanvända dem. Du måste bara måla dem (om du vill) för att göra dem lite unika och sedan montera dem. Du kommer att älska att sätta de spruckna tallrikarna och planteringarna i bättre användning och fåglarna kommer också att älska dig för det.
DIY-instruktioner och projektkredit - Patriciaspots

Gör en återanvändbar väska från trasiga paraplyer
När metallen i ett paraply går sönder är det normalt dags för papperskorgen. Nu kan du dock använda tyget från det paraplyet för att skapa dessa riktigt snygga vikbara återanvändbara väskor. Det är lite sömnad involverat men totalt sett är det väldigt enkelt att skapa dessa små påsar och de viks upp i en rulle så att du kan tappa dem med dig vart du än går. Dessa är bra för improviserade shoppingresor när du behöver en återanvändbar väska för att bära saker hem. De är så små att du kan hålla en i väskan och aldrig veta att den finns där.
DIY-instruktioner och projektkredit - Untrendylife

Gör pärlor från trasiga flaskor
Du skulle antagligen kasta ut en trasig flaska normalt. Du behöver dock inte. Du kan istället använda denna metod för att skapa vackra glaspärlor från den flaskan. Du kan sedan använda pärlorna för att göra valfritt antal andra hantverk från smycken till vindspel eller bara vad du vill. Observera att detta kan vara ett farligt hantverk, så du bör alltid vara försiktig och skydda dina ögon från glasskärvor. Om du kan få tag på det är det dock ingen gräns för vad du kan skapa av de gamla flaskorna.
DIY-instruktioner och projektkredit - instruktioner

Skapa två skrivbord från ett trasigt bord
Om du har ett köksbord som är repat, trasigt eller på annat sätt skadat eller ett som du inte behöver längre behöver du inte kasta ut det. Använd istället den för att skapa två bedårande väggdiskar som säkert kommer att bli en hit i ditt hem. Du behöver inte riktigt mitt på bordet så det här är ett bra projekt för bord som verkligen är skadade i mitten. Du skär helt enkelt av ändavsnitten, målar eller fläckar dem och fäster dem sedan på väggen.
DIY-instruktioner och projektkredit - Migonishome

Gör telys från flasklock
Okej, så flasklocken bryts inte riktigt när du kastar ut dem, men de kan verkligen ändras på nytt ändå. Du kan använda dem för att skapa bedårande värmeljusljus som är perfekta för när du behöver många ljus (tänk bröllop eller andra större evenemang). Du behöver bara rengöra flasklocken, tillsätta en veke och sedan hälla i lite vax. Vaxet kommer faktiskt från smälta kritor så det här är en dubbel poäng. Du får hålla flasklocken ur soptippen och du har något du kan göra med de gamla trasiga kritorna.
DIY-instruktioner och projektkredit - Austinweddingblog

Gör nya kritor från trasiga
Istället för att kasta de trasiga kritorna, skapa nya regnbågskritor från dem. Detta är ett så enkelt projekt och barnen kommer absolut att älska dessa regnbågskritor. Du behöver några burkar, tomma receptflaskor eller de små plastbehållarna som filmen kommer in och några trasiga kritor. Du smälter kritor i princip i burkarna (se till att rengöra dem ordentligt) och häll sedan i flaskorna tills de har härdat. Kritorna är i perfekt storlek och du kan göra dem i så många färger du vill - beroende på hur många trasiga kritor du har.
DIY-instruktioner och projektkredit - Momtastic

Använd trasiga plattor för marköverdrag
Även om du verkligen inte vill ha trasiga tallrikar i din verkliga trädgård, kan du använda dem istället för mulch för att ge vissa områden lite färg. Istället för att fylla i dina träd med t.ex. mulch eller småsten, använd de trasiga tallrikarna eller terrakottakrukorna. Du kan göra dem i alla färger för att få det att se riktigt elegant ut eller blanda ihop det för ett roligare och mer spännande utseende. Det är mycket billigare än mulch- och ärtgrus och ger dig ett riktigt unikt utseende i dina trädgårdsområden.
DIY-instruktioner och projektkredit - lägenhetsterapi

Använd trasiga tallrikar som trädgårdskantning
Du kan använda trasiga tallrikar och fat som kantning för runt trädgårdsområden och träd. Om du har något gammalt porslin som du verkligen inte kan ta med dig, använd dessa tallrikar för att skapa en vacker kant för trädgårdsområden. Plattor som är spruckna eller flisade kan brytas i hälften (naturligtvis noggrant) och sedan fastnar halvorna helt enkelt i marken. Du kan använda samma färger eller blanda upp det lite. Detta hjälper dig att ta hand om dessa tallrikar och ger dig en riktigt billig men ändå vacker kantning för dina favoritutrymmen.
DIY-instruktioner och projektkredit - Wondermom

Förvandla en gammal bok till en konstbok
Om du har gamla böcker (du vet, de med halva sidorna saknas) behöver du inte slänga dem. Du kan faktiskt använda gamla inbundna böcker för att skapa en riktigt snygg och funktionell konstbok som rymmer alla dina barns konsttillbehör. Dessa är utmärkta för att resa eftersom de tar lite utrymme plus de har ett väldigt smidigt litet handtag för enkel transport. Du behöver lite tyg för att göra hållare för pennor eller kritor och sedan handtaget och naturligtvis konsttillförseln.
DIY-instruktioner och projektkredit - Cosmocricket

Förvandla trasiga kritor till coola push-ups
Push-up kritor är lite dyra och att köpa flera färger kanske helt enkelt inte ingår i din budget. Vilket bättre sätt att bli av med de gamla trasiga kritorna än att göra dina egna krita-push-ups? Du kan också ta bort de tomma limsticksbehållarna samtidigt. Du måste bara rengöra limpinnarna och sedan hälla smält krita i dem. Barnen kan sedan rulla kritorna upp och ner efter behov. Det här är ett bra projekt att låta barnen hjälpa dig med eftersom det är väldigt enkelt och inte alls rörigt.
DIY-instruktioner och projektkredit - Infarrantlycreative

Förvandla trasig keramik till designerplanter
Du kan använda trasiga tallrikar, fat, tekoppar eller nästan vad som helst för att skapa vackra designplanter. Du använder bara en mosaikmetod för att fästa de trasiga bitarna till en terrakottaplantare med starkt lim eller mod podge. Detta är ett bra sätt att visa upp din kreativitet genom att skapa mönster och mönster eller bara sätta på den där du vill. Dina planteringsmaskiner kommer att vara unika och vackra och du behöver inte skicka de gamla trasiga rätterna till soptippen.
DIY-instruktioner och projektkredit - Allfreecrafts

Skapa ljus från Broken Globes
Har din jordglob gått sönder? Om det har, och du inte vill eller inte kan limma ihop det, använd det för att skapa dessa riktigt unika lampor istället. Dessa är utmärkta för barnrum eller så kan du till och med ha dem i köket om du vill. De är funktionella och pedagogiska samtidigt. Du kan måla insidan i en kontrasterande färg innan du monterar lamporna så att de verkligen sticker ut eller bara lämnar dem sin naturliga färg. Hur som helst, dessa lampor kommer säkert att utlösa en konversation.
DIY-instruktioner och projektkredit - instruktioner

Vänd trasiga kritor och tomma burkar till färgglada ljus
Tomma burkar eller vaser och några trasiga kritor kan normalt hamna i papperskorgen, men du kan kombinera dem och skapa riktigt färgglada ljus. Smälta bara kritorna och häll dem i färg för färg. Du kan göra dessa i gamla Mason-burkar för ett riktigt rustikt ljus eller använda någon glasburk som du planerar att kasta ut. Dessa skulle göra riktigt snygga gåvor om du ville kombinera ett par i en korg och det tar väldigt lite tid att skapa.
DIY-instruktioner och projektkredit - Notimeforflashcards

Förvandla trasiga smycken till nya bitar
Du kan ta trasiga smycken och sätta ihop dem för att skapa fantastiska armband med armband och manschetter, och det tar verkligen inte så lång tid. Ta bara dina trasiga smycken och några smycken för att skapa verktyg om du har dem (om du inte har det är de verkligen billiga i din lokala hantverksbutik). Du kan skapa unika och mycket kreativa bitar som matchar din stil eller skapa något speciellt att ge bort i gåva. Det finns ingen anledning att kasta ut de gamla kostymsmycken när de är trasiga. Gör bara något helt nytt med dem.
DIY-instruktioner och projektkredit - Hellohydrangea

Skapa magneter från trasiga smycken
Ta gamla trasiga örhängen, halsband och armband eller broscher och skapa vackra magneter av dem. Du måste bara limma juvelen på en magnet och sedan använda dem för att hålla ditt kylskåp eller anslagstavlor vackra. Om du har större bitar kan du skapa en magnet av dem eller sätta ihop mindre för att skapa ett mönster och sedan limma på en magnet. Hett lim fungerar bra för att hålla juvelerna på magneterna och ditt kylskåp kommer att se elegant och fantastiskt ut när du klär upp det med dina gamla trasiga smycken.
DIY-instruktioner och projektkredit - Livelovediy

Gör fågelmatare från trasiga tekoppar
Om du har en flisad eller trasig tekopp och ett fat som du planerar att kasta ut, gör en fågelmatare med dem istället. Du kan göra dessa på ungefär en timme och du behöver bara en tekopp eller mugg, fat, lim som är vattentätt och något att hänga mataren på eller med. Lägg till ditt fågelfrö så har du lyckat förvandla det papperskorgen till en skatt. Dina fåglar kommer att älska sin nya matare och du kommer att älska den enkla elegansen att ha en vacker tekopp och fat i din trädgård.
DIY-instruktioner och projektkredit - Blogglebeans

Vänd trasiga smycken till skåpdrag
Trasiga armband, örhängen och halsband kan användas för att skapa vackra skåpdrag för badrummet eller köket, oavsett vad du föredrar. Du tar bara de trasiga smyckena och klistrar på en gängad stolpe. Du kan hämta paket med gängade inlägg med skruvar i din lokala hårdvaruaffär för cirka $ 1 eller så. Använd epoxilim eller något liknande starkt för att hålla juvelerna på plats. Större bitar av kostymsmycken kommer att fungera bäst eller om du har mindre bitar kan du limma dem på en bas och sedan limma till basen.
DIY-instruktioner och projektkredit - Threescoopsoflove

Gör julpynt med trasiga CD-skivor
När CD-skivor repas eller flisas kommer de inte att fungera längre. Istället för att kasta dem i papperskorgen, använd dem för att skapa minidiskobollprydnader som kan pryda ditt träd den kommande julen. Du måste bara bryta CD-skivan (förutsatt att den är relativt fortfarande intakt) och sedan använda en het limpistol för att limma dessa bitar på glasprydnader. Du kan också prova detta med isoporbollar om du vill men glas fungerar mycket bättre. Du kan göra klart glas eller täcka ornament i olika färger med silver-CD: n för att skapa ett riktigt färgstarkt utseende.
DIY-instruktioner och projektkredit - Cremedacraft

Gör en potpurri skål från ett trasigt jordklot
Om du har en gammal jordglob som är trasig på något sätt kan du ta den bästa halvan och skapa en vacker skål för att visa potpurri eller om du målar insidan kan du till och med använda den som en nyckfull serveringsskål. Du kommer att behöva en rund träplatta för att limma till jordens botten för att hålla den i nivå när den är full, men du kan hämta dessa i din lokala hantverksbutik för mycket lite. Eller, om du har en plywoodbit, klipp bara en själv. Lim sedan helt enkelt jordklotet till basen och ha en fantastisk skål. Om båda jordhalvorna är i gott skick kan du göra två skålar.
Gör-det-själv-instruktioner och projektkrediter - Förutbestämda vänsterover

Skapa nattduksbord från ett trasigt skrivbord
Om du har ett gammalt skrivbord som är trasigt, slitet eller på annat sätt skadat, behöver du inte kasta ut det. Använd den istället för att skapa matchande nattduksbord. Även om toppen är helt utom reparation kan du göra nattduksbord från skrivbordet och sedan helt enkelt slipa och måla dem för att matcha din nuvarande sovrumsinredning. Det här fungerar bäst med skrivbord som har samma antal lådor på vardera sidan eller så kan du bara skapa en stativ från skrivbordet om du vill eller om den inte har matchande lådor på vardera sidan.
DIY-instruktioner och projektkredit - Sugarbeecrafts

Skapa en fransk stilbänk från trasiga stolar
Istället för att kasta de gamla trasiga matstolar, ta dem och skapa en fantastisk franskinspirerad bänk. Detta är ett av de mest eleganta projekten för trasiga möbler och ett av de enklaste också. Du behöver två stolar i samma stil och du måste skapa en trälåda för bänkstolen. Måla sedan i grunden vilken färg du vill (vit gör att den ser väldigt elegant ut) och lägg till en lätt kudde. Det här är ett utmärkt säte för sängfoten, en entré eller nästan var som helst i ditt hem och du kan göra det för nästan ingenting (jämfört med att köpa en till hundratals dollar).
DIY-instruktioner och projektkredit - Anoregoncottage

Gör coola galgar från trasiga stolar
Ryggarna från trasiga stolar kan användas för att skapa mycket unika och coola galgar. Du måste helt enkelt ta bort ryggen (eller ta upp dem om stolen har fallit helt ihop) och sedan lägga till hängmaskinvaran. Även om du förmodligen inte vill göra massor av dessa för att fylla i din garderob, ger de dig något att göra med de trasiga stolarna som är användbara och hjälper dig att hålla soporna ur deponin. Dessutom är de nyckfulla för att göra underbara gåvor.
DIY-instruktioner och projektkredit - Likecool

Vänd trasiga stolar till gräsmatta
En stol som har tappat benen är helt värdelös i matsalen men den kan vara perfekt för gräsmattan - när du gör den till en gunga som är. Du kan ta gamla stolar och helt enkelt måla dem, lägga till lite hårdvara och hänga dem från verandan eller ett stort träd i din trädgård. Det här är en bra idé för alla som har några matstolar som de överväger att kasta ut eftersom benen inte är robusta. Förvandla dem alla till gungor, måla dem i olika ljusa färger och dekorera din gräsmatta med dem.
DIY-instruktioner och projektkredit - Thisdiylife

Vänd en trasig cykel i en kruk- och kastrulle
Du behöver inte hela cykeln för det här projektet, bara hjulet. Cykelhjul är den perfekta storleken för att hänga krukor och kokkärl och eftersom de är runda kan du skapa ett skivspelare av dem så att dina kokkärl och kokkärl alltid är lätta att komma åt. Du måste bara fästa den hängande hårdvaran på hjulet så att du kan fästa den i taket. Lägg sedan till krokarna för dina krukor och kokkärl. Detta använder bra trasiga cyklar och ger dig lite organisation i köket.
DIY-instruktioner och projektkredit - instruktioner

Gör en spjälsäng mobil från trasiga cyklar
Det här är inte alls så svårt som det låter. Du hänger faktiskt inte cyklar men du kan skapa en bra mobil med hjulet på en trasig cykel. Cirkeln är faktiskt perfekt för formen och ekrarna på hjulet är perfekta för att hänga saker. Detta skulle också vara en bra idé för solsystemprojekt när du måste ha planeterna, solen och månen hängande i följd. Den runda formen gör att mobilen lätt kan vridas och du kan lägga till nästan vad som helst du vill fånga uppmärksamheten hos din lilla. Du kan till och med sätta en musiklåda på den om du vill.
DIY-instruktioner och projektkredit - Numinationavenue

Bygg en eldgrop från en trasig tvättmaskin
Du behöver faktiskt inte hela tvättmaskinen för det här projektet - bara den inre trumman. Du kan bygga en bra eldstad för bakgården och spara en del av den tvättmaskinen från att hamna i soptippen samtidigt. Du måste använda en hög värmefärg och det är lite arbete involverat, men inte alls så mycket som du kanske tror. Tvättrumman ger dig den perfekta formen så att din eldstad blir perfekt och den är väldigt lätt att skapa. Tänk dig det roliga du kommer att sitta vid elden på svala nätter och du sparar lite skräp medan du gör det.
DIY-instruktioner och projektkredit - lägenhetsterapi

Förvandla en trasig byrå till hyllor
Om du har en trasig byrå, kan du använda lådorna för att göra underbara karthyllor. Det här är bra om du har en byrå som du förvandlar till något annat och du inte behöver alla lådorna. Du kan lägga till en karta längst ner i lådan och sedan hänga den i jämnhöjd på väggen för att skapa en skuggboxhylla som rymmer små samlarobjekt. Det här är ett så enkelt projekt och kräver inte att lådan ska vara i perfekt form, så även om botten faller ut kan du skapa dessa hyllor istället för att klämma den gamla byrån i papperskorgen.
DIY-instruktioner och projektkredit - Olivebites

Förvandla trasiga stegar till bokhyllor
Trasiga stegar är verkligen inte något som du vill fortsätta använda. Om du har en gammal trästege som helt enkelt inte är säker att använda längre, släng den inte direkt. Ta istället ifrån varandra och använd de två avsnitten som matchande bokhyllor. Du kan skapa ett fantastiskt rustikt utseende med de gamla stegen, och antingen hänga dem på väggen eller bara sätta dem upp mot väggen (förutsatt att du styrker upp dem, naturligtvis). Varje stegsteg rymmer böcker, samlarföremål eller nästan allt annat du behöver där.
DIY-instruktioner och projektkredit - knappt mätt

Vänd en trasig tvättmaskintrumma till ett soffbord
Om du älskar det industriella utseendet eller bara vill ha ett soffbord som är roligt och unikt, ta ut trumman ur din trasiga tvättmaskin och gör den till ett bord. Du kan täcka överdelen med en rund bit glas (som du vill klippa) och sedan använda insidan för att lagra saker eller skapa en liten skuggboxeffekt. Möjligheterna för den här är oändliga. Du kan också använda en träplatta om du föredrar eller installera belysning inuti så att ditt soffbord hjälper till att belysa vardagsrummet.
DIY-instruktioner och projektkredit - instruktioner

Vänd en trasig resväska till ett bord
En trasig resväska (de tunga årgångarna) kommer sannolikt inte att göra dig mycket bra om du inte tar dig tid att göra den till något riktigt användbart. Genom att lägga ben i resväskan kan du skapa ett fantastiskt bord som är perfekt för vardagsrummet eller sängens fot. Du kan förvara saker inne i resväskan så att den är perfekt för att hålla rummet organiserat och det har ett riktigt snyggt vintageutseende som passar perfekt för dem som älskar den typen av inredning.
DIY-instruktioner och projektkredit - Designsponge

Återställ ett trasigt piano till en arbetsbänk
Har du ett gammalt piano som inte längre fungerar? Om du funderar på att skicka det till deponin, gör det inte. Du kan använda den för att skapa lite lagring och organisation istället. Ett gammalt upprätt piano har perfekt storlek och form för en dold arbetsbänk. Du måste ta bort en del av hårdvaran inifrån pianot för att göra plats för verktyg och liknande men det här är bra för garage eller verkstäder och mycket billigare än att gå ut och köpa en bänk. Dessutom fungerar pianobänken bra för att lagra böcker och tidskrifter.
DIY-instruktioner och projektkredit - Core77

Vänd trasiga vintage resväskor till husdjurssängar
Ditt skräp kan faktiskt vara ditt husdjurs skatt. Om du har en gammal trasig vintage resväska kan du göra din lilla hund eller katt till en bedårande säng från den resväskan. Du måste i princip bara ta bort toppen (så att den inte stänger på din lilla furbaby) och sedan lägga till fyllningen för sängen. Du kan också lägga till ben och om du har mer än ett husdjur som behöver en säng, använd toppen och botten för att göra två sängar. Detta är ett riktigt snyggt och väldigt enkelt projekt som säkert kommer att behaga dina husdjur och ger dig lite extra vintage-inredning.
DIY-instruktioner och projektkredit - Chaoticallycreative

Vänd en tvättmaskintrumma till en snygg pall
Ta ut trumman från din trasiga tvättmaskin, lägg till lite fyllning och du har den perfekta lilla pallen. Du kan också lägga till rullbensben för att ge det lite extra speciellt. Du kan fylla mitten med fyllning eller tänka på att skapa en topp av sorter för att täcka det stora trumhålet i mitten. Lägg till stoppningsstolen ovanpå den och gör den avtagbar så att du kan använda insidan för förvaring. Detta är bra för barn. Du kan ha sina färgböcker eller andra leksaker inne och de kan sitta på den medan de spelar.
DIY-instruktioner och projektkredit - Espritcabane

Förvandla det trasiga badkaret till en soffa
Verkligen? En soffa från ett gammalt klo fotbadkar? Absolut. Det här är lite mer komplicerat än några av de återanvändande projekten men det vore så värt att skapa denna vackra och eleganta soffa från ett gammalt keramik- eller järnbadkar. Du skär bara ut fronten för att göra plats för soffan, lägg i fyllningen och måla sedan om du vill. Om du har ett gammalt badkar som du tänker kasta ut, försök istället att skapa den här fantastiska soffan. Du kan använda den i sovrummet, vardagsrummet eller var du än behöver lite extra sittplatser.
DIY-instruktioner och projektkredit - Greenmoxie

Förvandla trasigt bestick till växtmarkörer
De gamla böjda eller trasiga skedarna och gafflarna behöver inte kastas. Tänk istället på att förvandla dem till handstämplade växtmarkörer. Detta är ett riktigt snyggt projekt som inte bara tar bort det gamla besticket, det ger dig ett riktigt autentiskt och rustikt trädgårdsområde. Denna enkla process stämplar faktiskt namnen ner i metallen så att det ser ut som om du har skapat anpassade markörer när du i själva verket kan skapa dem själv av bestick som var redo för papperskorgen.
DIY-instruktioner och projektkredit - Mossymossy

Skapa ett vackert TV-stativ från en trasig byrå
Istället för att kasta en gammal byrå när lådorna inte längre fungerar ordentligt, förvandla den till ett elegant TV-stativ. Du kan ta ut de tre bästa lådorna och använda de andra för att lagra filmer, CD-skivor eller tillbehör till spelsystemet. Med lite slipning, färg och några timmar kan du skapa ett nöjescenter som ser ut som om du betalat en förmögenhet, men faktiskt bara kostar några dollar. Du kan också göra detta för sovrum och använda de återstående lådorna som byråer om du vill.
DIY-instruktioner och projektkredit - Domesticsuperhero

Förvandla en trasig datorskärm till ett akvarium
Den här tar lite arbete men det är helt värt det, särskilt om du är någon som verkligen gillar teknik. Du kan urholka den skärmen och skapa en underbar akvarium från den istället för att skicka den till soptippen. Barn kommer absolut att älska fisk i en datorskärm och den är relativt liten (beroende på bildskärmens storlek) så det tar väldigt lite utrymme. Observera att detta gäller för äldre bildskärmar. Du kan inte riktigt göra den här med en platt skärm.
DIY-instruktioner och projektkredit - instruktioner

Förvandla en trasig upprätt till en elegant bar
Det gamla upprättstående piano som inte längre spelar en låt behöver inte rivas sönder och kastas bort. Du kan skapa en vacker bar från den som säkert kommer att bli hit för alla dina cocktailpartier. Du måste ta ut de faktiska spelpartierna och sedan måla eller fläcka pianot vilken färg du vill. Nycklarnas undersida kan förvandlas till en fantastisk vinglashållare och en spegel på baksidan gör den ännu mer elegant. Vilket underbart sätt att hyra det gamla pianot!
DIY-instruktioner och projektkredit - Househoneys

Gör en hylla från den trasiga gitarr
Om du har en gitarr som helt enkelt inte kan ställas in längre eller går sönder på något sätt, förvandla den till en riktigt snygg hylla. Du måste ta bort gitarrens framsida (förhoppningsvis utan att orsaka mer skada på rygg och nacke) och sedan helt enkelt lägga till hyllor inuti. Häng detta på väggen i din musikälskares rum eller förvara det i vardagsrummet för alla att beundra. Det här är ett utmärkt ställe att lagra CD-skivor och annat musikutrustning, annars kan du använda det som en bokhylla för noter.
DIY-instruktioner och projektkredit - Diybudgetgirl

Använd trasiga stengods för att ge växter elegans
Istället för att kasta ut den trasiga stengodset, använd den för att ge växter ljus. När stjälkarna är trasiga passar de fint in i krukväxter. Just stick them inside the dirt by the plant and add a tealight candle to the actual glass part. This is a great project that takes only seconds and can be used for both indoor and outdoor plants. Be careful not to cut yourself on the glass. This works with any glass that has a stem for the base.
DIY Instructions and Project Credit – Dumpaday

Turn A Broken Refrigerator Into An Outdoor Ice Chest
If your fridge is broken and you’ve had to replace it, you may think that hauling the old one to the dump is the next step. Instead, turn that broken fridge into a great outdoor ice chest. You have to be sure to remove everything that causes the fridge to run (or did before it broke). Then just cover it with wood (cedar works really well) and create an ice chest that is perfect for your outdoor kitchen or deck. You can use the racks and baskets from the fridge for holding items inside the chest.
DIY Instructions and Project Credit – Reddit

Make A Kitchen Utensil Holder From A Broken Rake
When the handle breaks on your rake, don’t automatically trash it. You can use the rake part to create a really neat and rustic looking holder for kitchen utensils. You just have to clean the rake top up a bit to remove any rust and you may want to think about sanding and painting it if it’s really rusty. Then just hang it on the wall and stick your spoons and ladles on it. This is also a great project for holding tools in the garage or tool shed and you don’t really have to clean it up for that.
DIY Instructions and Project Credit – Community

Create A Basket From Broken Blinds
Broken mini blinds normally find their way to the trash can. After all, what could you possibly do with them other than throwing them away? You could actually use them to make a very neat little basket that takes very little time. You just use a weaving method to create the basket and remember to staple together as you go along so that the basket is sturdy. If you have pets that tend to tear up your mini blinds, use them to make baskets instead of tossing them. These baskets are perfect for holding office supplies or just about anything else you can think of.
DIY Instructions and Project Credit – Stephagruss

Make A Wineglass Holder From A Broken Rake
Keep the top of that old rake when it breaks and create a rustic wineglass holder. The sections of the rake top are perfect for holding stemmed glassware and it gives you a great country look. You can simply sand away any rust that may be on the rake and hang it in its natural form or you can paint it with spray paint if you need it to be a specific color to match your kitchen or dining room décor. This is a great project for those old rakes that have broken handles but the tops are still in good condition.
DIY Instructions and Project Credit – Tatteredstyle

Create A Beautiful Chair From Broken China
Instead of throwing out that china when it’s broken, use it to create a stunningly beautiful mosaic chair. This chair is relatively easy to make considering how complicated it looks and it’s a great way to preserve old china that you may simply not want to get rid of even when it’s broken. You just take the broken pieces and put them together on an old chair base in whatever pattern you want. You can use larger pieces or create a smaller mosaic pattern if you have smaller broken pieces.
DIY Instructions and Project Credit – Dishfunctionaldesigns

Build Picture Frames From Broken Mini Blinds
Old mini blinds that are no longer fit to hang aren’t necessarily trash. You can take those blinds and create picture frames in a number of sizes and colors. No matter what material your blinds are made of, you can make beautiful frames for your favorite pictures that are unique and will help you to save money on buying frames for those prints. You just have to measure the pictures that you want to frame so that you have an idea of how many pieces of the blind you need. Then just stack and staple the pieces together to create your frame.
DIY Instructions and Project Credit – Domesticimperfection

Use Chipped Teacups As Curtain Tiebacks
Instead of throwing out those decorative teacups or putting them in the back of a cabinet, use them to create elegant Victorian looking curtain tiebacks. You will need to cut a hole in the bottom for the curtain to come through and then screw a cup hanger into the window frame so that the handle of the cup can be hung. This is a beautiful look and is perfect for formal dining rooms, especially near the china cabinet where you have other dishes in the same pattern sitting.
DIY Instructions and Project Credit – Bhg

Make A Kindle Cozy From Torn Jeans
If you have old dishes that have seen better days, you can use them to create beautiful lighting for your kitchen or breakfast nook. You need cups and saucers in the same pattern or you could use different patterns and make it really unique and interesting. You will need to attach the lighting and this is better done on a wooden plank so that you can keep all of the cups and saucers straight and even. This is a neat project though and one that really won’t take you long.
DIY Instructions and Project Credit – Punkprojects

Make Lighting From Chipped Cups and Saucers
If you have old dishes that have seen better days, you can use them to create beautiful lighting for your kitchen or breakfast nook. This is a neat project though and one that really won’t take you long.
DIY Instructions and Project Credit – Apartmenttherapy

Turn Broken Shutters Into Garden Holders
A broken shutter and some mason jars give you the perfect materials to create a little mini garden for the home or yard. You just have to clean up the shutter, paint if you want and then add the mason jars which are held in place with hot glue. If you are planning to add heavier plants, use clamps. You can cover them up with twine or ribbon. This is great for a kitchen herb garden and keeps you from having to haul those old shutters off to the dump.
DIY Instructions and Project Credit – Sheknows

Use Broken Records To Make Bookends
Have some old vinyl records that are scratched beyond repair? You can use those records to make really cool bookends, which are perfect for teenager’s bedrooms or family rooms for the musically inclined. There is a really easy method that will allow you to bend the bottom of the records so that they sit flat on a surface. Then you just have to add your books. This is also a great way to organize those records or CDs that you have lying around. Just create the bookends from torn or scratched records and use them to keep good ones in place.
DIY Instructions and Project Credit – Homesessive

Create A Bulletin Board From Broken Mattress Springs
If you have smaller mattress springs (think baby bed mattresses or twin beds) you can use those springs to make really useful bulletin boards. This is actually a really neat project that you can customize however you want. Add a mirror, some shelves or just whatever else you want and then just sit the springs up against the wall near your desk. You can also hang it on the wall with some sturdy hardware which is great if you don’t really have floor space available.
DIY Instructions and Project Credit – Funkyjunkinteriors

Turn A Broken Door Into A Shelf
After you replace that broken door and before you throw out the old one, consider turning it into a glorious shelf. You can add fabric, batting and even lighting to create a wonderfully unique shelf that is as functional as it is lovely. The door can stand in the corner or up against a wall or you could add hardware to it for hanging. Older doors give you a great rustic look and you can add as many shelves as you need. Plus, the lights help to illuminate your favorite books or collectibles.
DIY Instructions and Project Credit – Bulbtoblossom

Make A Pot Rack From A Screen Door
If you have a broken screen door and you are considering replacing it, keep the old one. You can use that door to make a very roomy and very attractive pot rack for your pots and pans. Just repaint or re-stain the door and then use chains to hang it from the ceiling. You can add hooks to the screen part for hanging pots and pans and keep lids or other items on top so you get loads of organization and all from that broken screen door that you were planning to throw away.
DIY Instructions and Project Credit – Thekitchn

Turn A Broken Suitcase Into A Medicine Cabinet
Forget throwing that old vintage suitcase away. Even when it’s broken, that suitcase can be used to create a great looking and fully functional medicine cabinet. Just clean out the inside, add some small shelves and you have the makings of a beautiful vintage medicine cabinet that will bring to mind those old traveling medicine men. Add screws to the back to hang it on the wall and if you don’t really need to close the door, you can attach it to the wall open and add shelves on both sides.
DIY Instructions and Project Credit – House-capades

Make Shelves From Torn Books
If you have a few hardcover books that are missing pages or otherwise no longer being read, you can turn them into literal bookshelves. These are really neat and require very little work. In fact, you just have to hang a shelf bracket and then slide the book in. You can create an entire wall of these “book” shelves in just a few minutes and they are great for the bedroom of your favorite bookworm. They also work well in hallways to hold knick-knacks or just anywhere you need them.
DIY Instructions and Project Credit – Realsimple

Turn A Broken Door Into A Coatrack
Take that old broken door, add a few coat hooks and perhaps some mirrored pieces and you have a beautiful coatrack that is perfect for your entryway or mud room. You can do this with even a small piece of a broken door and then just stain or paint it whatever color you need to match your existing décor. If you have an entire door, you could add shelving or create cubbies to hold shoes and other items in the mud room. This is a great repurpose idea for old doors and for organization as well.
DIY Instructions and Project Credit – Prettyhandygirl

Create Napkins From Torn Denim
If your closet is filled with torn jeans that you are tempted to throw away, think about making a few denim napkins first. You can create beautiful napkins with minimal sewing and these are great for summer cookouts. You basically just fold and sew the denim and you can create pockets for holding silverware. This is an easy project and one that you can work on with different materials so whether you have old jeans in the closet or any other clothing that is ripped or stained, you can make napkins from any of it.
DIY Instructions and Project Credit – Yourpocketstylist

Make A New Aquarium From That Broken Old TV
If you have an old console television that no longer works – or a smaller TV for that matter – you can use the base to create a beautiful new aquarium. You will need to be very careful when removing the electronic pieces of the television and when installing the glass and other aquarium parts. This is a great weekend project and if you do have a console television, you will end up with a great aquarium that sits on the floor. The top of the TV is turned into a lift-off lid so you can feed your fish and tend to the aquarium parts as they need serviced.
DIY Instructions and Project Credit – Apartmenttherapy

Make Mirrors From Broken Rackets
Instead of trashing those tennis rackets when the insides come loose, turn them into sporty mirrors. You simply have to remove the netting from inside the racket and then add a mirror to fit that space. You may need to take the measurements (or the entire racket if it’s easier) to a glass cutter to get a mirror shape that will fit perfectly. Then just attach the mirrors to the rackets and hang them in your little tennis player’s bedroom or anywhere in the house.
DIY Instructions and Project Credit – Countryliving

Make A Garden Trellis From Broken Tennis Rackets
When you have several tennis rackets that are no longer fit for use (or you could use badminton rackets for this as well) you can turn them into a really nice looking trellis for the garden. This is great for homes with tennis players and it gives you something to do with those rackets instead of simply throwing them away. You just have to gather and group your rackets together, prepare a frame for them and then assemble it. You can paint them all the same color or go with different colors if you want something a bit bolder.
DIY Instructions and Project Credit – Apartmenttherapy

Turn Broken Drums Into Lights
If you have a drummer in the family and you happen to have a broken drum set, you can make gorgeous drum lights. These are great for the bedroom of your rock star or you could use them in a family room or rec room, whatever you prefer. They are relatively easy to make and can be easily hung from the ceiling. The drums work perfectly as lights and are a great touch if you are looking for something a bit out of the norm for your lighting. Plus, it keeps you from adding those drums to your local landfill.
DIY Instructions and Project Credit – Makelyhome

Create Stuffed Animals From Turn Gloves
If your gloves tend to only last one season before they rip or tear, you can make them last a bit longer by turning them into adorable stuffed animals. This is a great project to begin for the Christmas season as these little cuties make wonderful gifts for all the kids on your list. This is also a good project if your gloves have the fingertips missing because you will remove them anyway. You will have to do a bit of hand sewing but the project is really easy overall.
DIY Instructions and Project Credit – Boredpanda

Make Chainmail From Pop Tabs
Okay, so you would probably be throwing out those pop tabs with the cans, right? If you want, you can use those tabs to create a fabulous chainmail purse. It takes a little preparation and cutting to get the tabs ready but once you are done with that, you can simply put them together and create any number of chainmail items. You can do anything from a purse to a costume to picture frames or just about anything else that you can think of to create from your homemade chainmail.
DIY Instructions and Project Credit – Instructables

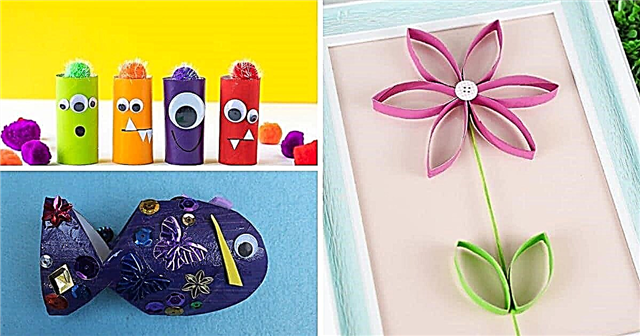
Turn Toilet Paper Rolls Into Art
Okay, so they’re not technically broken but empty toilet paper rolls belong in the trash, right? Well, maybe not. You can actually use them to create stunning wall art so if you tend to like recycling, this is the perfect project for you. You can do this in any number of designs and the paint can be in any color that you need. No one but you will know that your elegant art actually began life as a cardboard toilet paper roll and you can help to minimize your trash by not having as many rolls to throw out every week.
DIY Instructions and Project Credit – Cutoutandkeep

Make Birdhouse Stands From Broken Ladders
When your old wooden ladders are no longer safe for you to stand on, you can turn them into beautiful stands for your birdhouses. This works with ladders of all sizes. If they are wooden, just paint them or leave them as they are if you want something a bit aged and rustic looking. You simply have to sit the birdhouses on top of them and you may want to attach them with a screw to keep them secure. You could have these sitting all over your garden area.
DIY Instructions and Project Credit – Hometalk

Turn A Broken Bed Into A Bench
An old headboard and footboard can be used to make a wonderful corner bench for the little ones. You just have to attach the two together, create the actual seat and then paint or stain the color that you want. Add a cushion and your little ones will adore sitting here to eat or play. You could use this in the dining room or put it outside on the deck if you need extra seating out there. It’s an easy project and a great way to use up those old parts from your broken beds.
DIY Instructions and Project Credit – Myrepurposedlife

Make A Beautiful Bench From That Broken Dresser
This is a great project for dressers that have several broken drawers. While you may want a couple of the drawers to work properly for use on the bottom, the rest of the dresser is basically removed to create the bench. You can then use the bench at the foot of your bed or even on a deck if you need additional outdoor seating. Paint or stain any color and create something that perfectly matches your existing furniture. This is an easy project that will take you less than a day to complete and keeps you from throwing out that broken dresser.
DIY Instructions and Project Credit – Prakticideas

Create Stunning Jewelry From Broken Clothespins
If you have had your clothespins for long, you may notice that the wood has begun to chip or pull completely apart from the spring. Go ahead and pick up new clothespins but save those old broken ones to create stunning jewelry. This is such an easy project and one that doesn’t require any special tools. Plus, it’s a great gift idea that is not only cheap but allows you to use up those springs instead of tossing them out. You can create pendants, earrings or even charm bracelets with them.
DIY Instructions and Project Credit – Michlinla

Create Pedestal Picture Frames From Broken Materials
Take those broken or mismatched candlesticks and those picture frames that no longer hang or sit upright and create elegant pedestal frames that are perfect for gift giving or keeping all to yourself. Just spray paint the frames and candlesticks the same colors and then glue them together once the paint has dried. These are so very easy to make and are perfect for older frames that no longer want to sit where they should. Plus, you can use those candlesticks that you don’t have any other use for.
DIY Instructions and Project Credit – Fancyfrugallife

Create Storage From Torn Books
While you may balk at the thought of tearing up your old books, if you have any that are already torn then this is a great project. You simply hollow out those hold books and use them to store your belongings. You leave the outside intact so when you add them to your bookshelves, they look like real books. You can use them to store items safely out of view and they are really easy to make. You can do one at a time or create a little nook with several book covers.
DIY Instructions and Project Credit – Sewingbarefoot

Use A Broken Door To Make A Crafting Table
A broken door that you can’t really use on your home any longer is perfect for creating a colorful crafting table that your little ones will love. You just use the door as the top and then place it on cube organizers which work to hold all of your little ones’ craft supplies. Actually, if you made it tall enough this would even work as an adult’s crafting table so it just depends on what you need. You can cover the door with fabric or just paint it the color that you want.
DIY Instructions and Project Credit – Marthastewart

Make A Lamp From A Broken Shovel
Have a broken shovel that you are planning to throw away? Before you do, take a look at this wonderful shovel lamp. It’s really easy to make and this is perfect for lighting up the pathway outside your garden area. Imagine the pattern that you could create if you had several of these. You could also use them for added lighting in the garage or in a workshop or just put them right there in the kitchen. You can spray paint your shovel whatever color you need so it’s easy to match the lamp to your existing décor.
DIY Instructions and Project Credit – Project-re

Create A Sporty Bag From A Torn Basketball
Basketballs don’t stay up forever. In fact, cheaper ones will begin losing air rather quickly and depending on the size of the hole in them, you may not be able to air them up again. When that time comes, you don’t have to toss them. You can make a fashionable and really cute bag from them that is perfect for any girl who is into sports. Note that you can do this with a volleyball or football as well so this is a great gift idea for your little cheerleader or a sports mom who is really supportive of her players.
DIY Instructions and Project Credit – Project-re

Turn A Torn Shower Curtain Into A Play Mat
When your shower curtain liner gets a hole or when the tops tear and you can’t keep it on the hooks any longer, you can turn it into a wonderful play mat that your children will adore. You can let the kids create roads and cityscapes for their toy cars or use dry erase markers and let them color their favorite pictures over and over again. Dry erase will wipe easily from the plastic liner so this is a great way to keep the kids busy and give them loads of creativity at the same time.
DIY Instructions and Project Credit – Filthwizardry

Keep Buttons From Torn Clothing for Jewelry
When you have a shirt or sweater that is torn or permanently stained, take a minute to remove the buttons before trashing the clothing. You can use those buttons to create beautiful button bracelets that are fun and would make the perfect inexpensive gift for someone special. You just cut a piece of elastic in the size you need, sew the ends together rather tightly and then sew on the buttons. You can create any number of designs and patterns and each bracelet can be completely unique.
DIY Instructions and Project Credit – Lillyella

Use Broken Dishes And Silverware To Make Wind Chimes
Have some broken china that you can’t bring yourself to part with? Or, perhaps you have some vintage silverware that can no longer be used for eating but you just hate to throw it out. Use those pieces to make beautiful wind chimes that you can hang from your porch. This lets you keep those dishes that you don’t really want to throw away and they make a beautiful sound when the wind blows. You could also use broken costume jewelry as accents if you have any on hand so this is a great project for using up a lot of your broken household items.
DIY Instructions and Project Credit – Songbirdblog

Turn A Broken Chandelier Into A Serving Tray
A broken chandelier (one that no longer works as opposed to one that is actually broken into pieces) makes a beautiful dessert tray. You will need to remove all of the hardware for the lighting from the base and each individual light. Then simply attach china plates to the places where the lights used to hand and use those plates for serving up your favorite desserts. This is a great project for upcoming weddings or is perfect for the Holidays when you want an elegant dessert tray. Broken costume jewelry like faux pearl strands are great for embellishing the tray.
DIY Instructions and Project Credit – Dreaming-n-color

Make Rag Rugs From Torn Clothing
Those old t-shirts that are no longer wearable and just about any other clothing that you may have that is ripped or torn can be used to make wonderful rag rugs. This is also a great project for torn sheets and even curtains in certain fabrics. You can use different clothing materials and colors to create a multi-colored rug or use sheets and old blankets in the same colors for something a bit more elegant. These rugs are perfect for the kitchen in front of the sink or you could use them in the bathroom as bath mats.
DIY Instructions and Project Credit – Littlehouseliving

Use Knobs From Broken Doors For Patio Flooring
Before you throw those old doorknobs away, even if the doors are completely useless, you can turn the knobs into beautiful flooring for your outdoor patio. Actually, you can also use those old burners from your stovetop that no longer work and other items around the house that are broken or otherwise trashcan bound. The different finishes will give your patio a great look and the pieces are very stable when you set them in soil and surround them with your favorite outdoor plants.
DIY Instructions and Project Credit – Sunset

Turn Doorknobs Into Wine Corks
When your doors are broken and in need of repair, keep the doorknobs and use them to create these beautiful and very unique wine corks. All you need are the decorative doorknobs and some cork, which you can buy at any craft or hardware store. You could also just use the cork that comes in your wine bottles if you wanted. This works best with old knobs that have screws in them or you could use old cabinet pulls if they are decorative enough. You simply have to push the screw into the cork by turning and get ready because this could take a bit of time. The end result however, is well worth the effort.
DIY Instructions and Project Credit – Brokegirlsguide

Empty Tin Cans Make Great Hairbrush Holders
While tins cans aren’t really broken, they are useless once you get the food out, right? Instead of adding them to your trash heap, use those cans to make wonderful holders for your hairbrushes. You just have to remove both ends of the cans, clean them very well with warm soapy water and then cover them with Washi tape, paint, wallpaper or just about anything else you want. Fabric works very well and hot glue does a good job of holding your cover in place. Then attach them with screws to the inside of your vanity door and you have a great place for storing and organizing brushes.
DIY Instructions and Project Credit – Thecreativeimperative

Turn Broken Picture Frames Into Decorative Molding
If you love the look of picture frame molding but aren’t really a fan of the cost, you can make your own with those old broken picture frames. If you have frames that have lost their backing or their glass has been broken, you just remove all of that, paint them the color that you want your molding to be and then hang them on the wall. You can use frames that are all the same size or create a pattern from frames of different sizes. This is a great look and one that seems expensive. Only you will know that you have salvaged trash to create it.
DIY Instructions and Project Credit – Bobvila

Make A Jewelry Holder From Broken Spindles
When stair spindles are broken, they may seem useless. You can however, repurpose them into gorgeous jewelry holders that are unique and very creative. You just have to paint them, add a base and then use them to keep your necklaces and bracelets from getting tangled. If you are looking for a unique gift idea and one that won’t cost a fortune, this is a good one. The best part is you make it from something that you were probably just going to throw away. You could also use an old drawer pull or broken costume jewelry to decorate it.
DIY Instructions and Project Credit – Sublime-living

Use Bent and Broken Silverware For Drawer Pulls
Instead of throwing out that old silverware when it bends or breaks, use it to make cabinet door handles instead. This is actually a really popular look and one that may cost a bit if you went out and bought all of those handles. Instead, you can make your own with silverware that you were planning to toss. If you have silverware that is tarnished beyond repair, simply clean it up a bit and paint it if you want to create rustic looking handles that look much more expensive than they are.
DIY Instructions and Project Credit – Whiteleycreek

Make Good Use Of A Broken Binder
When binders break, they are normally trash. After all, they’re really not that expensive and most people simply throw them out without considering what could be done with them. If you cut away the actual cover part, you can use the binder as a key holder. Just attach it to any wall with screws, which will fit nicely into the holes already in it, and then use it to hold keys or put it outside on the deck to hold grilling utensils, towels by the pool or anything else you need. You can paint it if you want or even mount a few of these onto a wooden base.
DIY Instructions and Project Credit – Upcycleus

Create A Stunning Table From A Broken Piano
There really isn’t a lot that you can do with an old piano when it stops working. You can however, create beautiful shadowbox type tables and depending on the size of your piano, you may be able to make two of these for the living room. You use the keys on the inside of the table to give it a really neat musical look and then cover with glass that you can have cut at your local hardware store or glass cutter. These are beautiful and help to somewhat preserve the look of the piano so you don’t really have to throw it all away. You can keep the best parts.
DIY Instructions and Project Credit – Trash2treasure

Turn Leaky Buckets Into Outdoor Serving Items
Those old leaky buckets are useless when it comes to holding liquid but they will serve as holders for your outdoor eating very nicely. You just take some time to give the bucket whatever look you want and then use it for holding silverware, napkins or other solid items when you eat out. Give it a great patriotic look and use it for your 4th of July table outside. It doesn’t take very long to create something great out of an otherwise useless bucket.
DIY Instructions and Project Credit – Hometalk

Make Soap Dispensers From Glass Bottles
If you tend to buy things in glass bottles (like certain bottled waters or wines for instance), you don’t have to necessarily chuck the bottles when they are empty. You can use them to make soap dispensers that are gorgeous and really functional. You will need to get some pumps which you can buy at a craft store or you could just preserve the pump from lotions if you want. Then just clean up and even decorate the bottles with broken jewelry, mosaics made from broken china or anything you want and fill with your favorite liquid soaps.
DIY Instructions and Project Credit – Theredchairblog

Make Coasters From Old Wine Corks
Instead of throwing out the corks when you are finished with the wine, use them to create great coasters. This is a great project for corks that no longer serve their purpose because they don’t need to be in perfect shape to make coasters. The coasters have a great beach-y look to them and they are easy to put together. You need a hot glue gun to attach them to each other and then just tie them off with ribbon or twine, whatever your preference. These are absolutely adorable and such a wonderful way to reuse those old corks.
DIY Instructions and Project Credit – Thefrugalnavywife

Make Monsters From Bread Clips
Once the bread is gone, you normally throw out the clips, right? Some people do use them for other things and if you are one of those people, this is a great Halloween project for you. You can turn those clips into adorable monsters that you hang on DIY garland to decorate for the holiday. Just paint monster faces on your bread clips and this works with clips of all sizes, even the ones that may be broken or chipped. Once you have your monster faces done, just clip them all onto a rope or string for hanging.
DIY Instructions and Project Credit – Craftyladylindsay

Create Berry Basket Snowflakes
Okay, so normally you would throw out those plastic berry baskets, especially if they’re broken. Before you do however, take a look at the beautiful snowflakes that you can create with them. This works well even with baskets that are broken or ripped. You really just need the bottom of the basket and it’s ok if the bottom is a bit worse for wear as well. Just create the snowflake shape and then glue and dip in glitter. These are great for hanging outdoors for the Holidays or you could even use them to decorate the tree.
DIY Instructions and Project Credit – Alphamom